
We built a RAG-based chatbot with LangChain and LavinMQ. Here is how, part 2

In part 1, we looked at where a message queue fits in a RAG system. We looked at a simple setup without a queue, where the crawler and ingestion worker are tightly coupled, and saw how that approach starts to break down as the system grows. We then introduced a queue as a buffer between discovery and processing, showing how it absorbs spikes in work, isolates failures, and makes the system more reliable.
In this part, we will review a demo built following that pattern, step by step. We will start with the ingestion pipeline, setting up the crawler, the message queue, and the ingestion worker, then move on to how we process, chunk, embed, and store data in the vector database. Finally, we will connect everything to a simple web-based chat interface so you can see the full RAG system working end-to-end.
Building the chatbot
To reiterate, the demo has two separate paths: the first is the background ingestion path, where the crawler watches the docs and blog, publishes changed pages to the queue, and the ingestion worker processes those jobs and updates the vector database. The second is the question-answer path, where the web interface sends a user’s question to the RAG API, retrieves the most relevant chunks, and generates a grounded answer.
To keep the demo simple, all of these services live in a monorepo. That means we can build and run each part of the system in one place, while still keeping the architecture clear: one path keeps the knowledge base fresh in the background, and the other uses that knowledge to answer questions in real time.
Setting up cloud services
Before running anything, three cloud services need to be set up:
- CloudAMQP for LavinMQ, which handles background jobs between the crawler and the ingestion worker.
- Pinecone for vector storage, which holds the embedded chunks used during retrieval.
- OpenAI for embeddings and answer generation.
1. Create a CloudAMQP instance
First, create a CloudAMQP account and provision a LavinMQ instance. Once the instance is ready, copy the AMQP URL from the instance’s detail page. This is the connection string both the crawler and ingestion worker will use to publish and consume jobs.

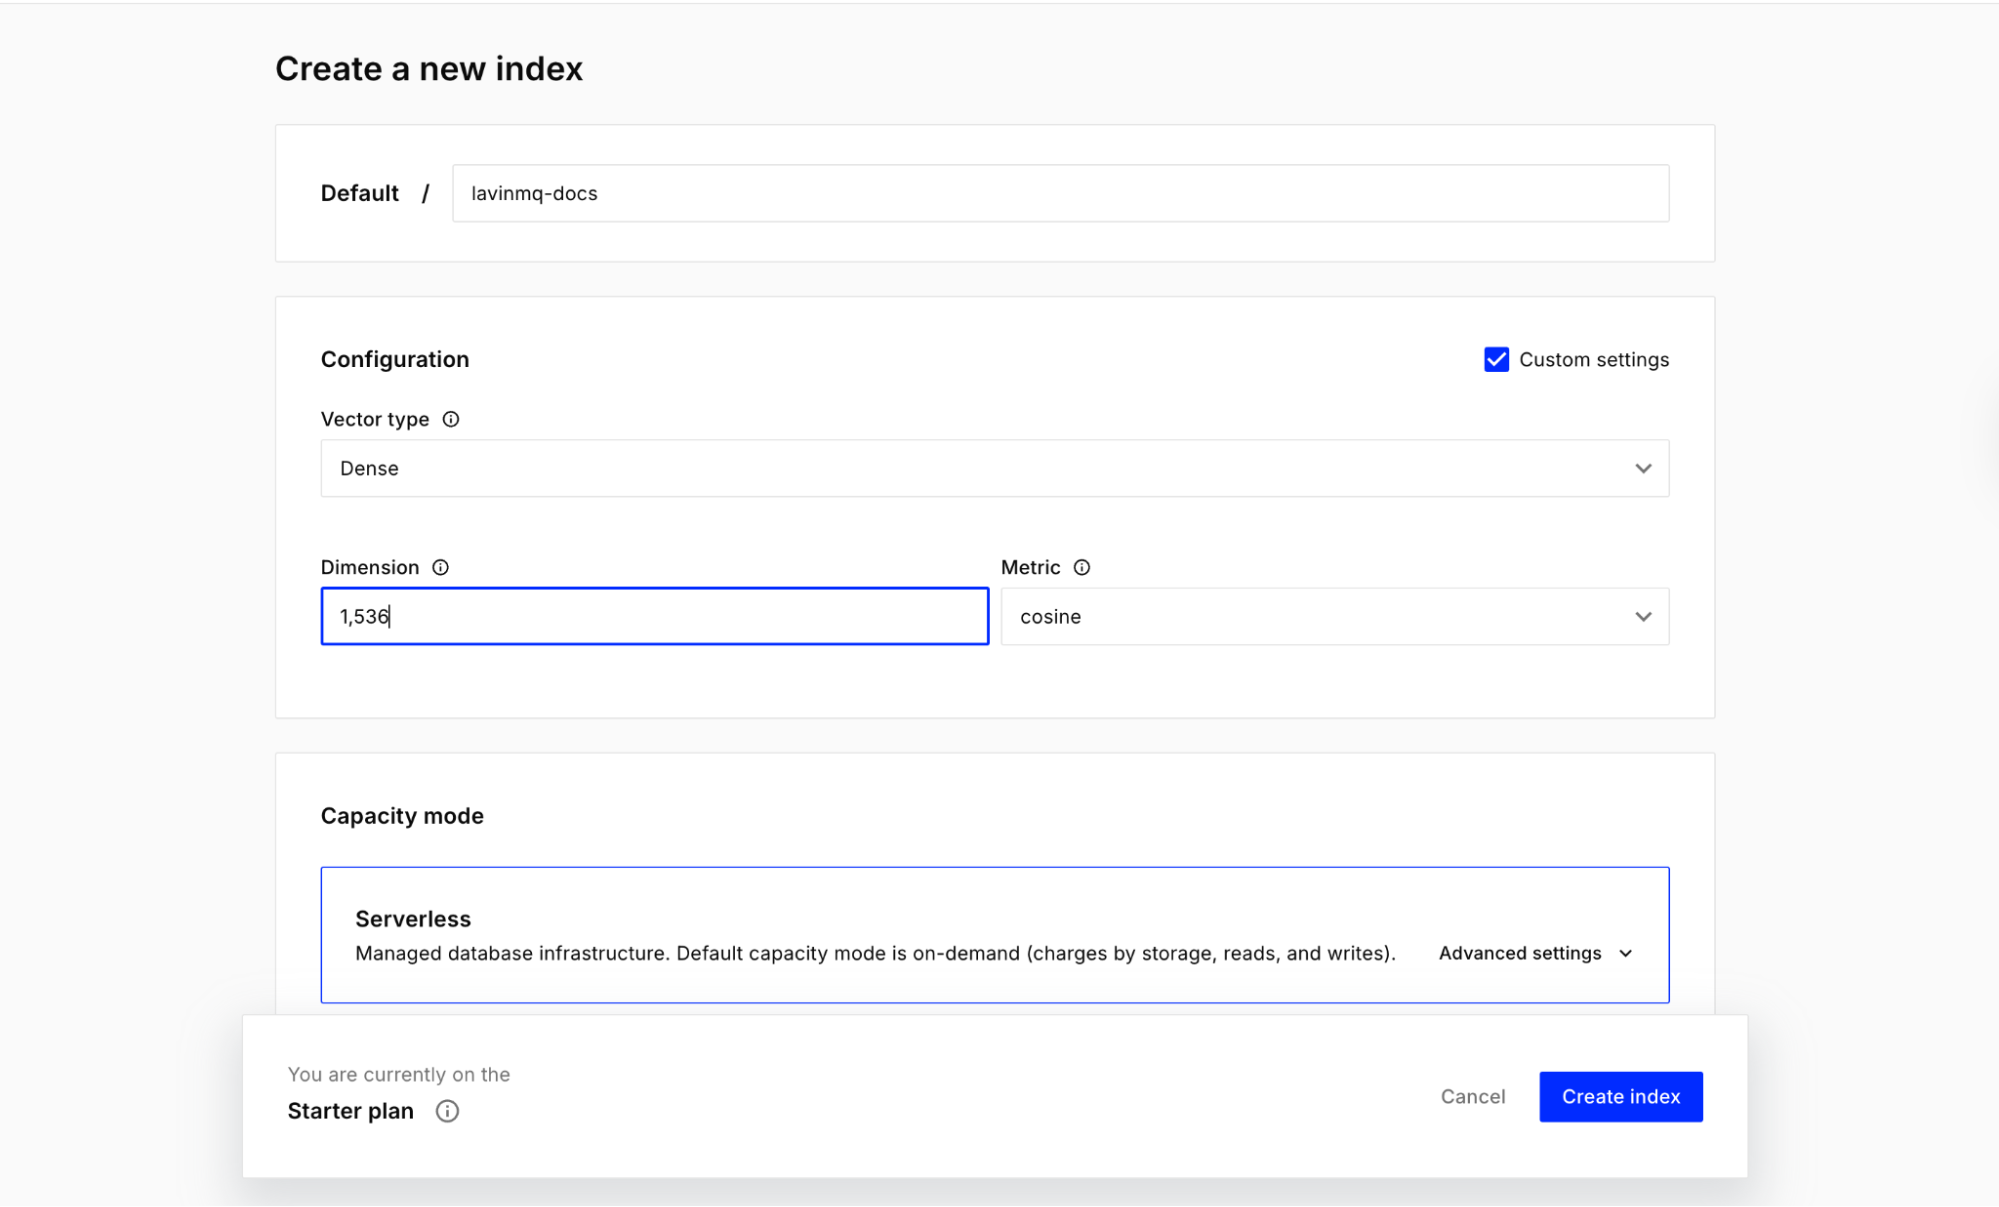
2. Create a Pinecone index
Next, create a Pinecone account and create an index for the demo. Once that is done, copy the Pinecone API key and the index name. The demo uses lavinmq-docs.
Important: when creating an index for the demo, set its dimension to 1,536.
3. Create an OpenAI API key
Finally, create an OpenAI API key. This is used in two places: to generate embeddings during ingestion, and to generate grounded answers in the retrieval service.
4. Clone the repo and set environment variables
Clone the repository and move into the project root:
git clone https://github.com/cloudamqp/lavinmq-demos.git
cd lavinmq-demos/mq-compass
Each service expects its own .env file. This is important for the multi-terminal setup, since every service runs independently and reads its own configuration.
Create a .env file inside each of the following directories: crawler/, ingestion_service/, retrieval_service/.
The crawler’s .env file:
AMQP_URL=amqpsxxxxx
CRAWLER_SAFETY_TIMEOUT_SECONDS=36000
The ingestion service’s .env file:
AMQP_URL=amqpsxxx
INGESTION_QUEUE=ingestion_jobs
SQLITE_PATH=crawler.db
OPENAI_API_KEY=sk-proj-xxxx
OPENAI_EMBEDDING_MODEL=text-embedding-3-small
PINECONE_API_KEY=xxx
PINECONE_INDEX_NAME=lavinmq-docs
PINECONE_NAMESPACE=mq-compass-demo
HTTP_TIMEOUT_SECONDS=20
CHUNK_SIZE=900
CHUNK_OVERLAP=120
The retrieval service’s .env file:
PINECONE_API_KEY=xxx
PINECONE_INDEX_NAME=lavinmq-docs
PINECONE_NAMESPACE=mq-compass-demo
OPENAI_API_KEY=xxx
OPENAI_EMBEDDING_MODEL=text-embedding-3-small
OPENAI_CHAT_MODEL=gpt-4o-mini
RETRIEVAL_TOP_K=4
Choose your path
There are two ways to run this demo:
- Multi-terminal, where each service is started manually.
- Docker, where everything comes up with containers.
The multi-terminal setup is used here because it makes the architecture easier to see and understand. For the Docker version, follow that path in the GitHub repository.
Running the ingestion pipeline
The ingestion path has two core services. The crawler watches the docs and blog for new or changed pages, then publishes those pages as jobs to LavinMQ. The ingestion worker consumes those jobs, fetches the page content, chunks it, generates embeddings, and updates Pinecone. Together, these two services keep the knowledge base fresh in the background.
Install dependencies
Note: This demo uses Python 3.13.12. Python 3.12 also works. You can use pyenv to install and switch between Python versions.
Create and activate a virtual environment first:
python3 -m venv .venv
source .venv/bin/activate
Then install the Python dependencies:
pip install -r crawler/requirements.txt
pip install -r ingestion_service/requirements.txt
pip install -r retrieval_service/requirements.txt
Start the ingestion service
Open your first terminal and run:
source .venv/bin/activate
export DATABASE_PATH=./crawler.db
cd ingestion_service
PORT=8102 python server.py
This starts the background worker that listens for jobs from LavinMQ.
Start the crawler API
Open a second terminal and run:
source .venv/bin/activate
export DATABASE_PATH=./crawler.db
uvicorn crawler.main:app --reload --port 8001
Trigger a crawl
Open a third terminal and trigger the crawler:
curl -X POST "http://127.0.0.1:8001/crawl"
This can also be done from the crawler’s API docs page at http://127.0.0.1:8001/doc.
Once this runs, the crawler will inspect the docs and blog, detect changed pages, and publish jobs. If the publishing works, messages should appear in the LavinMQ management interface:
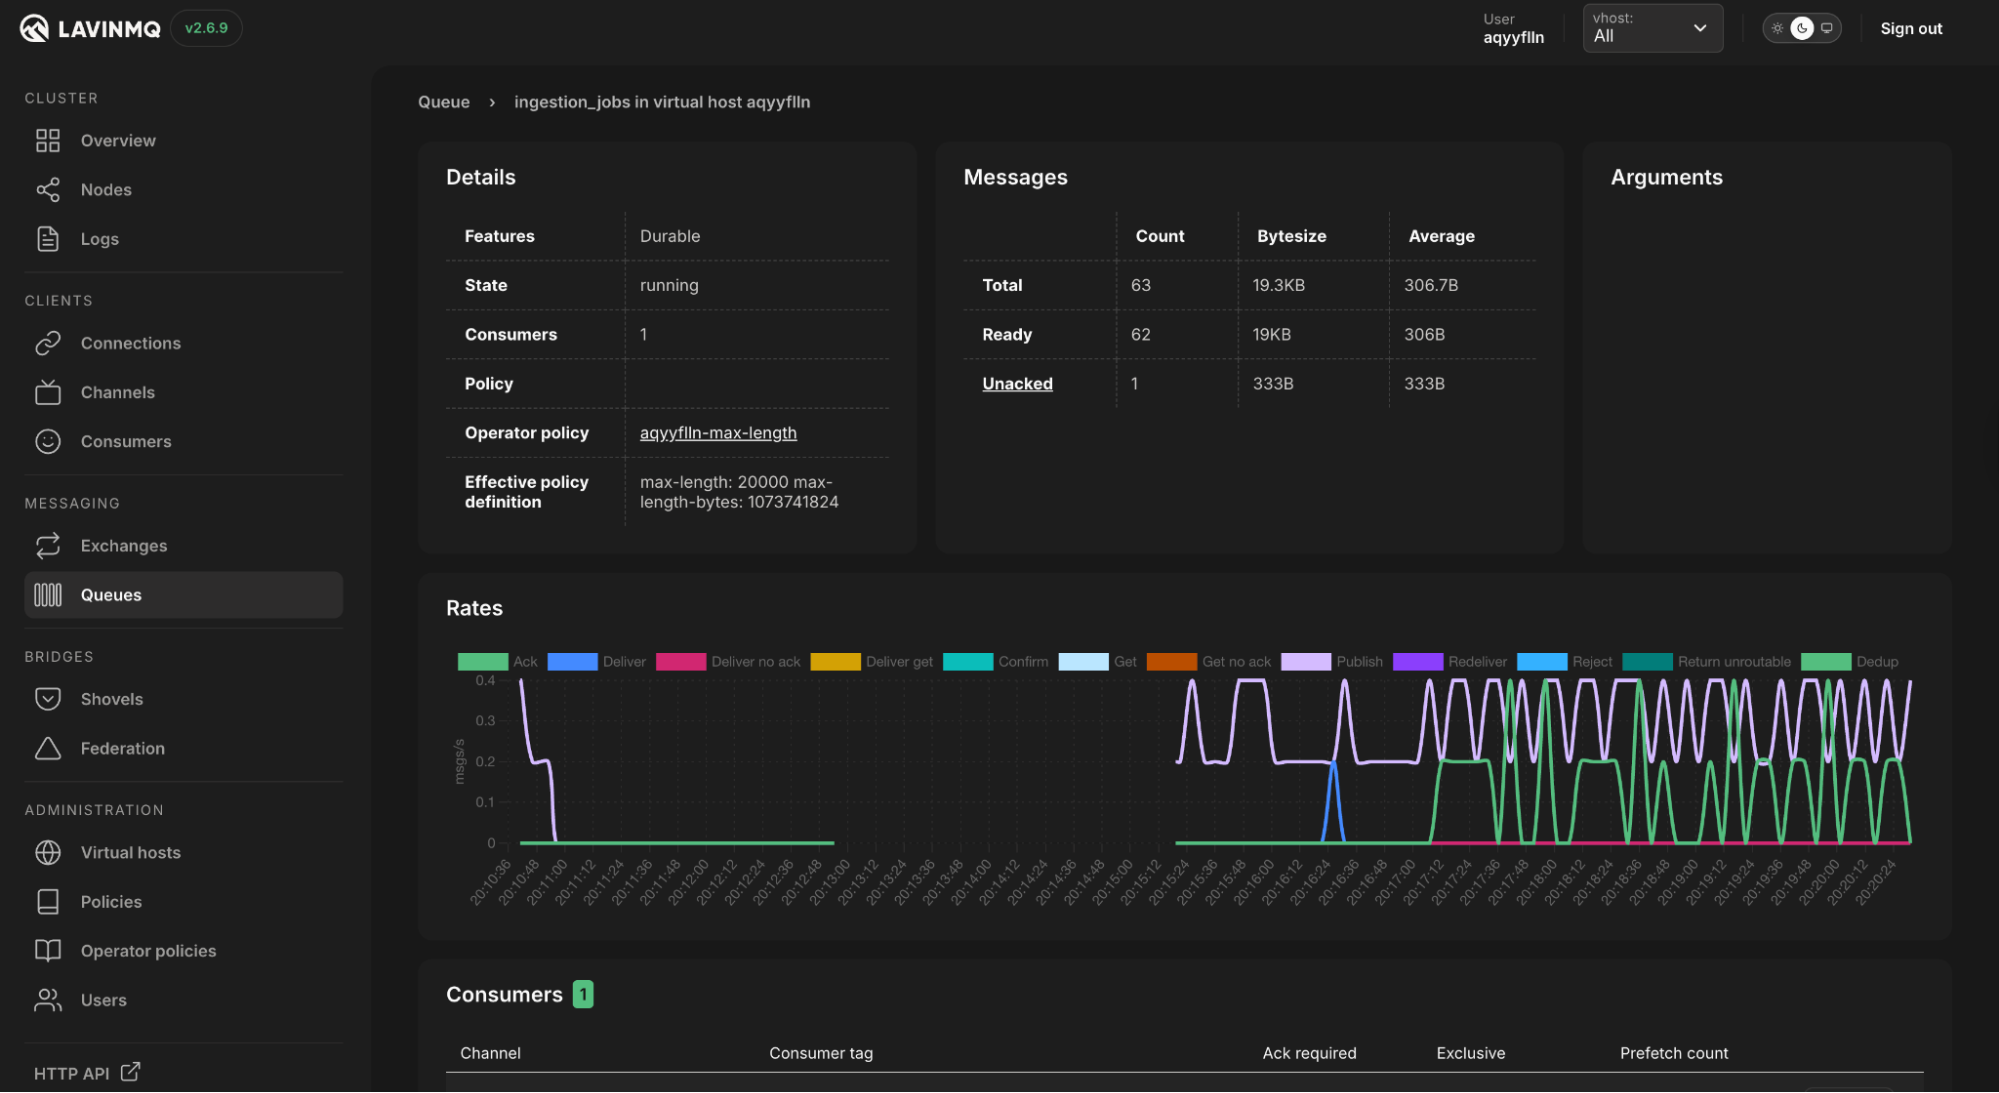
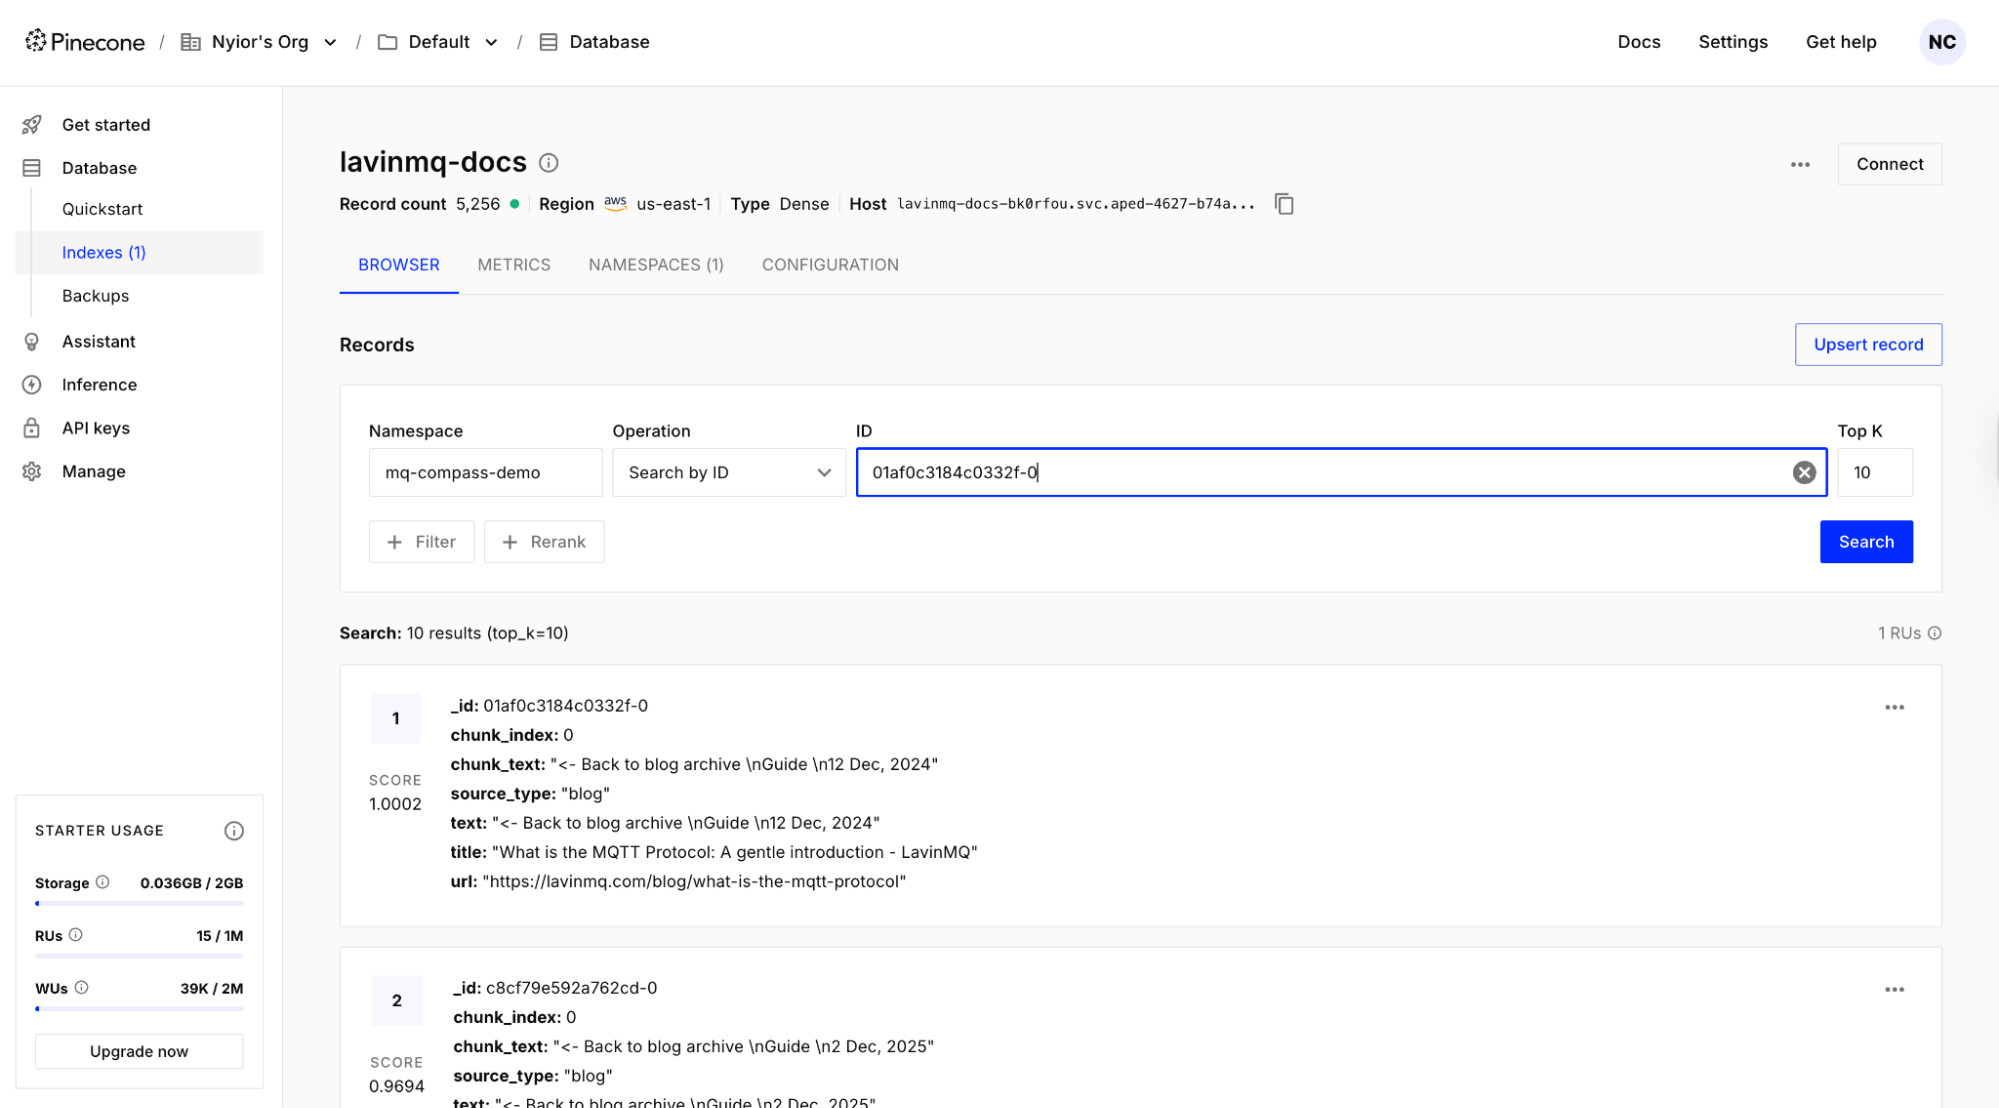
The ingestion worker will then pick them up and process them. If the ingestion works, records should appear in the Pinecone index:
Running the question-answer path
The question-answer path also has two core services. The retrieval API receives a user question, retrieves the most relevant chunks from Pinecone, and generates a grounded answer. The chat widget is the browser interface where the user asks the question and sees the answer and supporting sources.
Start the retrieval API
Open a fourth terminal and run:
source .venv/bin/activate
uvicorn retrieval_service.main:app --reload --port 8000
Start the chat widget
Open a fifth terminal and run:
export BACKEND_API_URL=http://127.0.0.1:8000
cd chat_widget
PORT=3000 node server.js
The chat interface is now running. Expand the widget and submit a query:
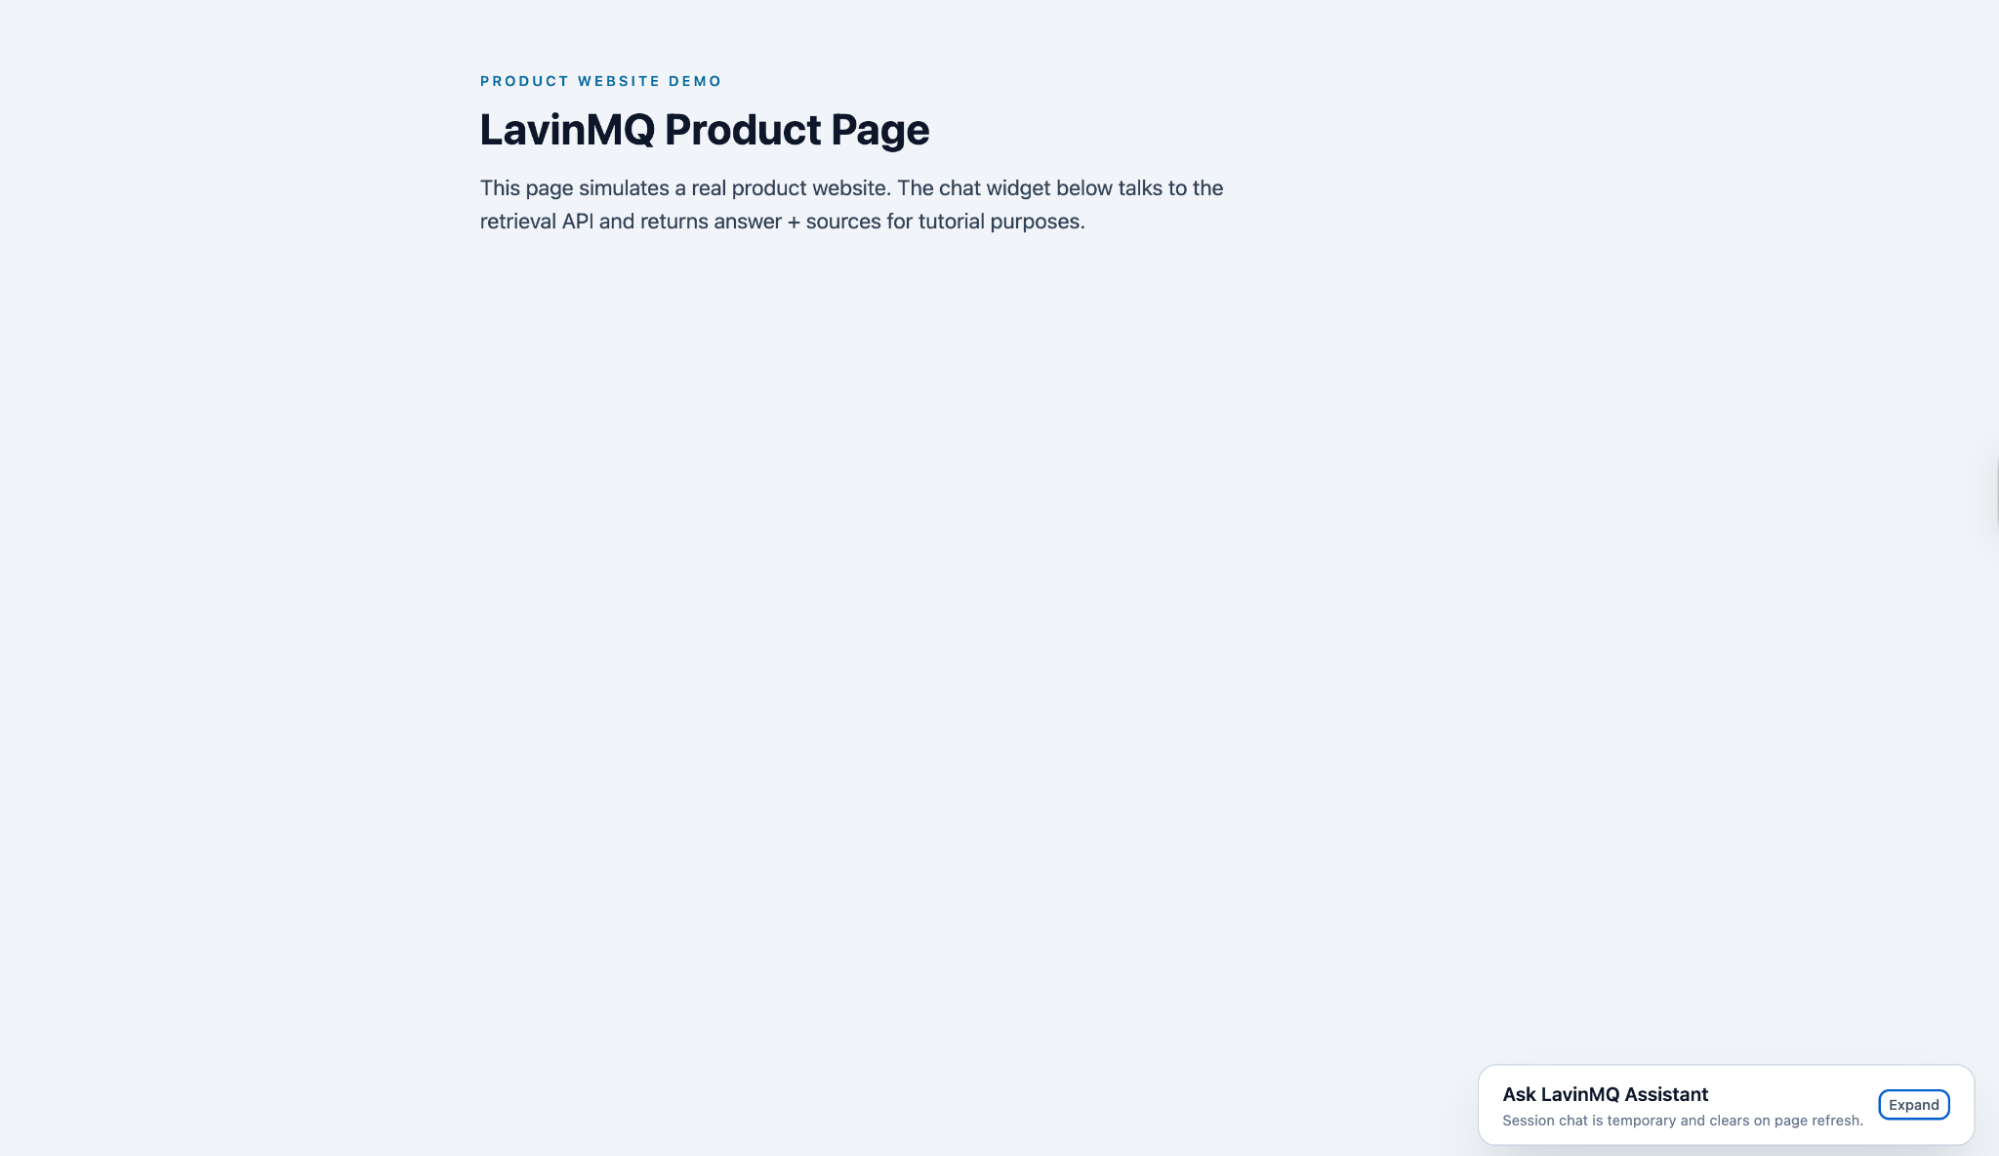
When does RAG make sense?
There was a time when RAG was the go-to approach for giving an LLM access to custom data. Models had small context windows, so if the data was not already inside the model, it simply could not use it. RAG solved that neatly: fetch what matters, then answer.
Today, modern models can handle much longer context, which means retrieval can sometimes be skipped entirely. Drop a large document straight into the prompt and get a good answer. That is simpler: no chunking, no vector database, no retrieval step, and no risk of the system missing the most relevant piece.
But simplicity at a small scale does not always hold at a real scale. Long context works well when data is small, static, and easy to fit into a single request. As soon as data grows, changes frequently, or spans many sources, it becomes harder to manage. More tokens means higher cost and latency. In contrast, RAG gives structure: it controls what gets retrieved, keeps responses grounded in specific sources, and allows knowledge to be updated without rebuilding everything.
That is where RAG still shines, especially with product or enterprise data like in this demo. Documentation, release notes, support guides, and internal knowledge are constantly evolving. Pushing all of that into every request is not practical. A system that fetches only what is relevant and keeps answers tied to real, up-to-date sources is the stronger choice.
RAG is no longer the only option. But it remains a strong choice when data is large, dynamic, and needs to stay accurate.
For simple, clear breakdowns of AI concepts like this, visit Guidely.
When a queue makes sense in AI systems
In this demo, the queue only appears in the ingestion pipeline. That was intentional.
Inference is the moment an LLM generates an answer from a given input. In a real-time user flow, like a chat interface, a user expects an immediate response. Introducing a queue there is a bad idea: the request would sit in line before being processed, adding delay and breaking the experience.
There are, however, inference scenarios where a queue makes sense because they are naturally asynchronous:
- Transcribing long audio or video files
- Generating detailed reports from many documents
- Creating AI-generated images or videos
In these cases, the user expects the work to take time. The request can be queued, processed in the background, and the result returned later. This leads to a simple rule: queues fit best when the work is not time-sensitive and can happen in the background.
That is exactly what ingestion is. Crawling pages, processing content, generating embeddings, and updating an index are not user-facing actions. They happen behind the scenes, often in large volumes, and need to be reliable even when things fail. The queue separates discovery from processing, handles many updates without overwhelming the system, and provides a clean way to retry failures, while keeping the user-facing path simple and fast.
Conclusion
Use RAG when data is large, dynamic, and needs to stay grounded in real sources. Use a queue when the system has background or long-running work that needs to be handled reliably. And only introduce both when the problem actually calls for them.
If you run into issues following this demo, reach out on the LavinMQ Slack channel.
Nyior Clement